
The Situationists' Walkman - Tech deep dive
This post follows on from our introductory entry where we introduce the project goals and concepts and present our findings. It is intended for a technical audience and takes a deep dive into the process.
To recap and contextualise, these are the challenges we needed to solve:
- Listener location - accurately position them in world space
- Listener orientation - the direction of their head/ears
- Virtual speaker positioning
- Sound emission shape, direction and attenuation
- Sound occlusion
- 3D or spatial audio
Prototyping & technology
One early idea was to construct a 3D “digital twin” of Arnold Circus via mapping and LIDAR data. The hypothesis was we could then work on that model in either XCode or Unity/Unreal to place the virtual speakers and design the artist zones, leaning on an audio engine such as PHASE or Google’s Resonance Audio for spatial sound. An advantage of this approach would be the ability to develop and test offsite on a PC or even in VR. The trick would be to later swap out the first person navigation from joystick/keyboard with realworld listener positional data via GPS. This approach seemed advantageous by leaning on a lot of tried and tested subsystems.
We were warned a few times about the lack of precision from GPS and infrequent updates but what didn’t really coalesce until discussing amongst the wider XR community was that the accuracy was a likely problem for the listener positioning rather than speaker location. The analogy would be a first person shooter video game with a very low frame rate. Rather than jittery graphics we’d likely experience audio glitches as the audio engine calculations tried to keep up with the low resolution updates. We couldn’t afford any playback issues that would break the sense of immersion. I should clarify that we didn’t have capacity to test this out with a prototype so had to reason it through. That’s something we would change in hindsight.
Whilst looking into ARKit, we became aware of ARGeoAnchors as one of the possible content anchors. These offer the ability to anchor AR overlays to persistent world locations, alongside the more familiar surface, image, object and body or face recognition. One important restriction is that geo anchors are currently limited to a number of U.S. cities and London - we just snuck in there!
At this stage the first big compromise started to become clear. To allow us to achieve 1) above - if we lean on geo anchors, then the participant must have their phone out! To enable the kind of accurate location lock AR experiences need, the Apple device and ARKit will get an initial location from GPS data (similar to how you navigate in Maps) and then download pre scanned 3D image data around your approximate location and compare that to feedback from the device’s LIDAR depth sensor. We decided to accept the tradeoff initially and dive deeper into ARKit to see what other advantages it brings. Ultimately, we could still prompt the user to position their phone in a way that doesn’t encourage them to look at it e.g. hold it to their chest and provide experience feedback or instructions aurally, discouraging any need to look at the screen. A third eye, if you will!
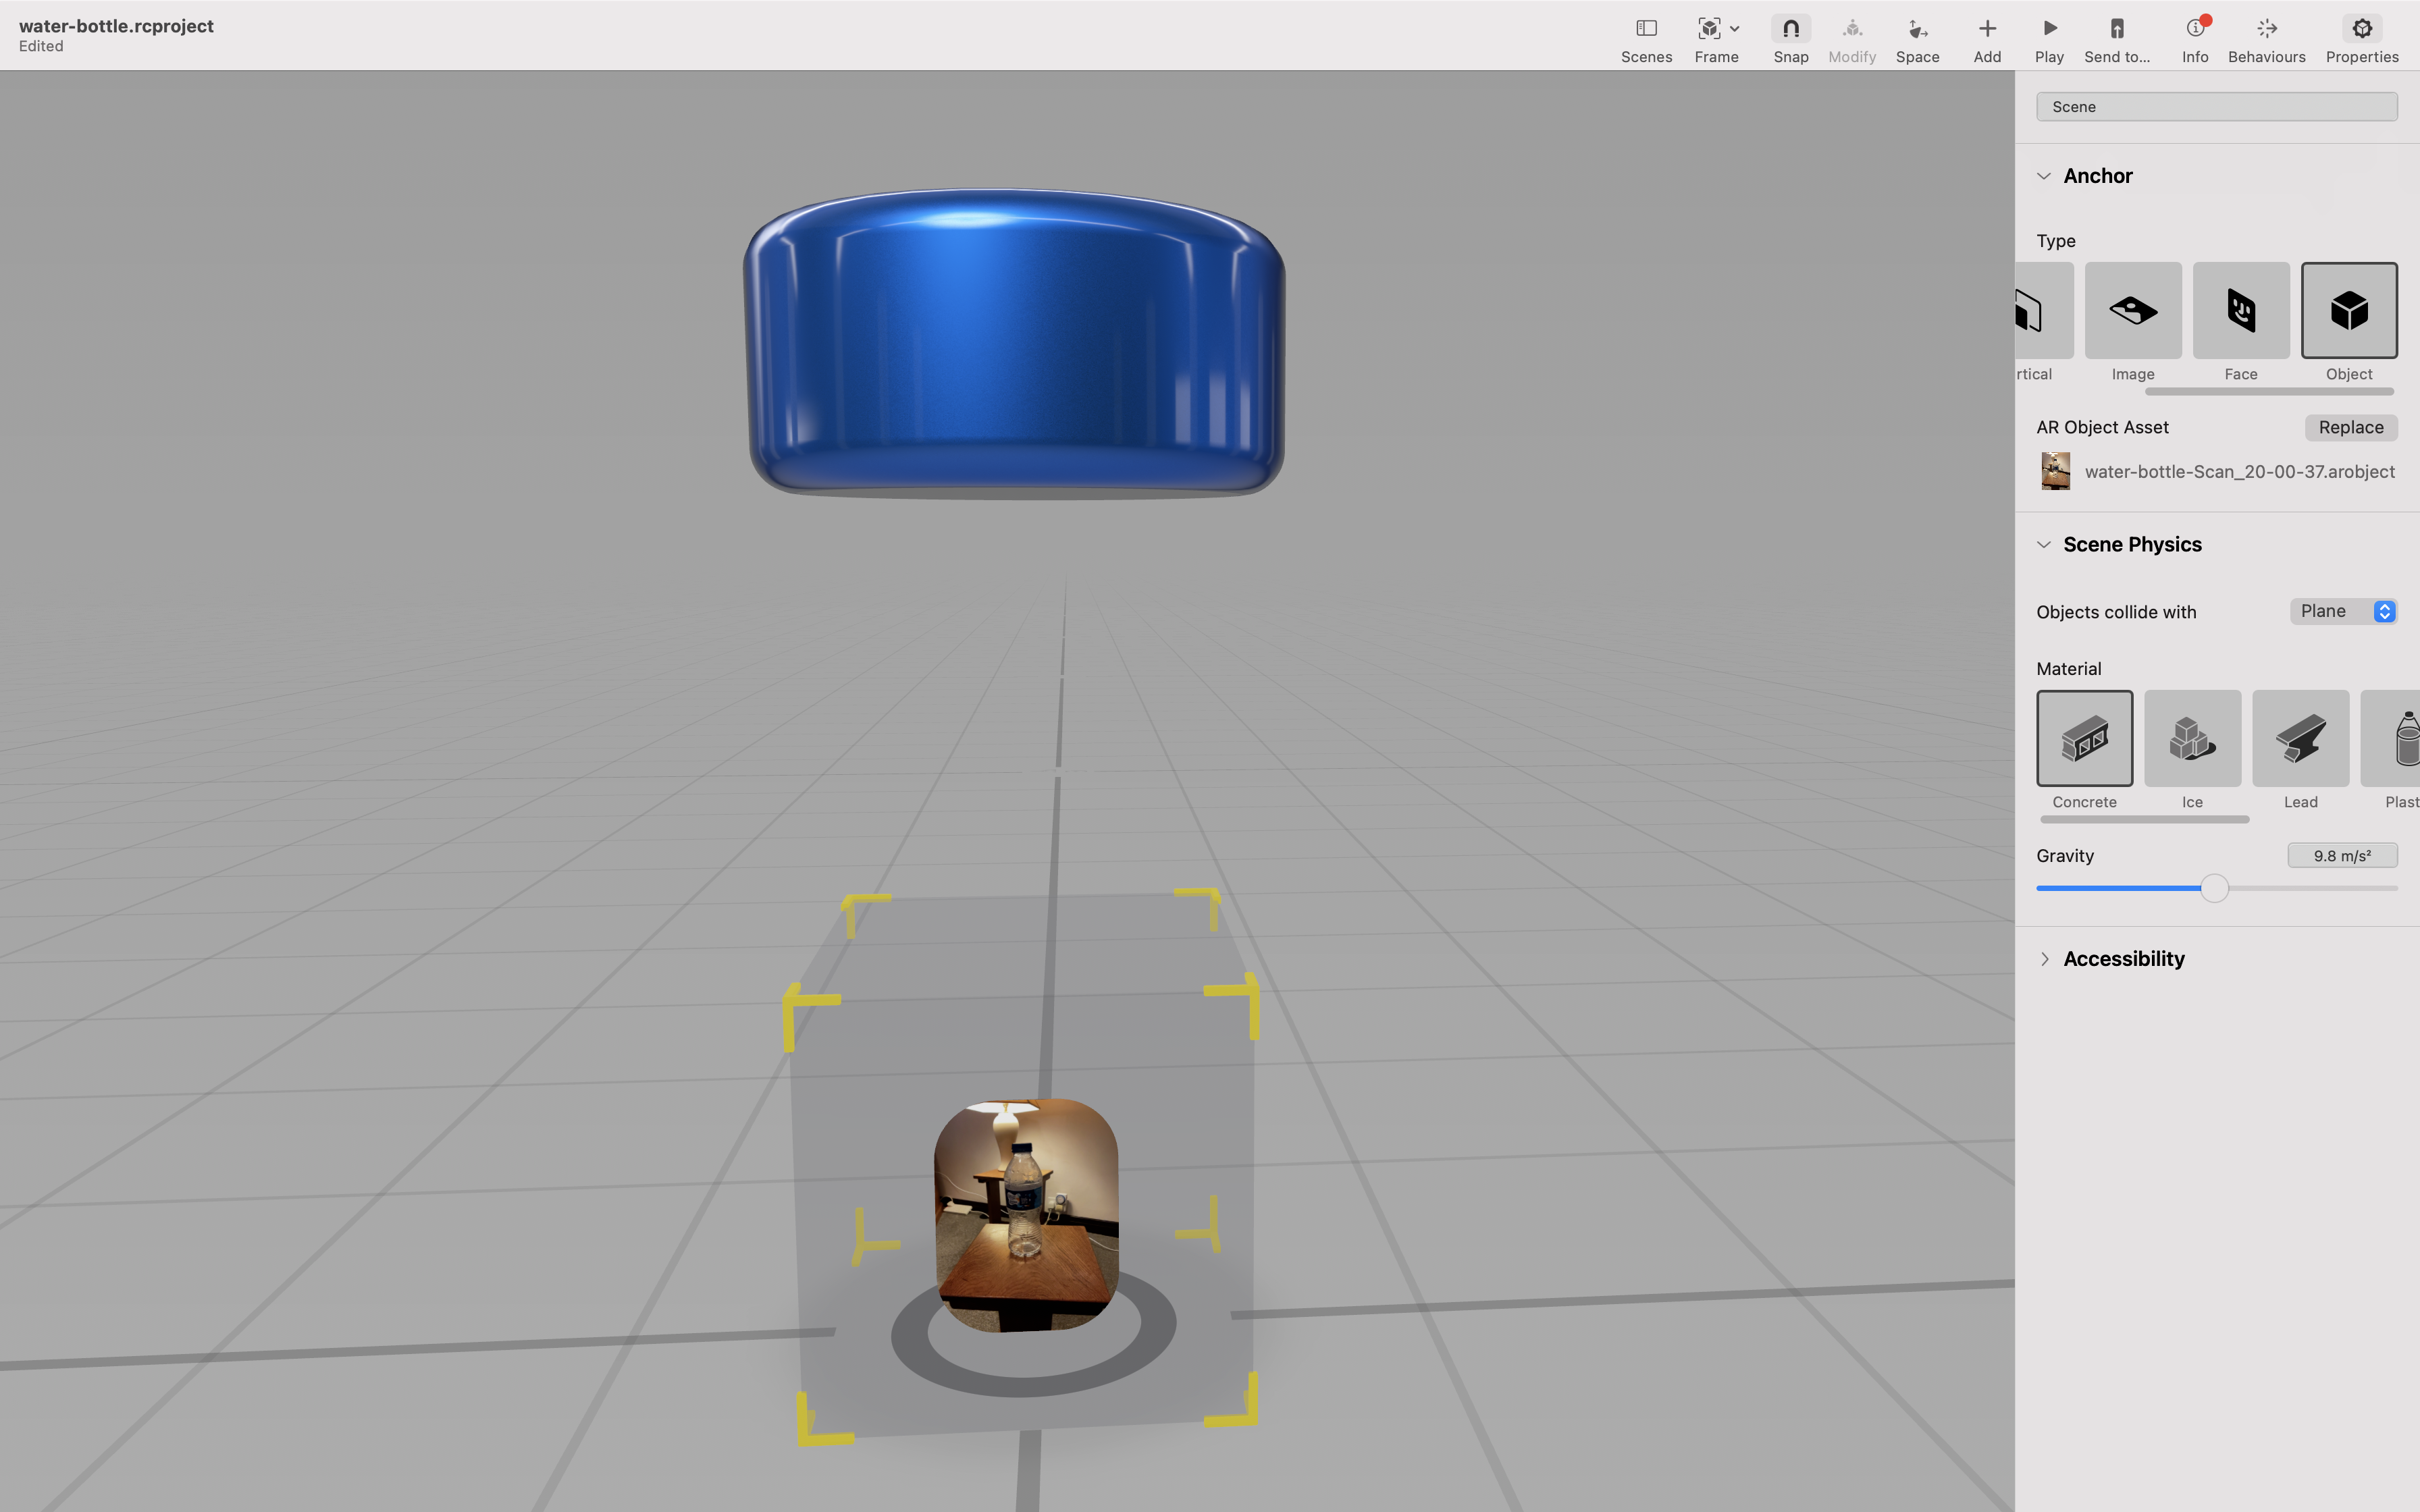
To dig deeper into the capabilities of ARKit, we needed to get familiar with creating a model or an ARReferenceObject (*.arobject files) to trigger content anchors. To do this we used some sample code from Apple to scan and detect 3D objects and create the model a water bottle (amongst other things). One can then set up code in XCode to detect a model and trigger AR content.
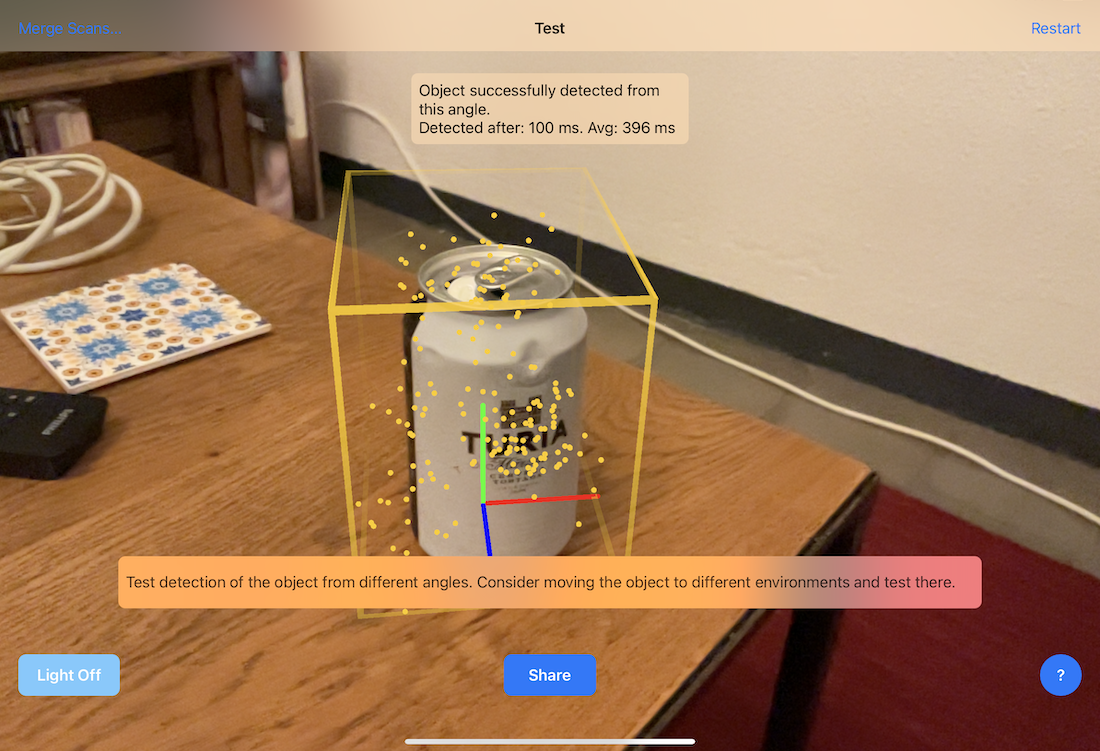
A far simpler way to test an object or model recognition is to load it into a Reality Composer project. You can see an example in this Github repo where we animate properties of a simple geometric shape to appear via a behaviour once the object is detected. It’s worth noting at this stage, if you create a new project in XCode from the “Augmented Reality App” template alongside SwiftUI, you’ll generate the boilerplate code to run up and load a Reality Composer *.rcproject file into a RealityKit runtime. This theoretically means you can prototype or design in Reality Composer before you fully integrate into your experience.
Next we worked on building an indoor AR experience that triggered audio on object recognition. Starting simple with just one object + sound before adding a few into the scene and creating a mix of audio as you move around.
That worked pretty well but alas, we’re not quite done yet as there didn’t seem to be a way to control the radius and attenuation of the sound using the built in SCNAudioPlayer. We’re putting the finishing touches to another post focussing specifically on the various audio engine options but we trialled and discounted AVFoundation (attenuation settings were global, not per source) en route to getting PHASE going as in our test AR project. The subsequent repo commits tweak the settings and a visualisation wireframe mesh. Stay tuned for a tutorial on using PHASE in projects such as these, as the official documentation is rather sparse, and we ran into some interesting problems along the way.
This gave us some confidence that we could use PHASE alongside an AR experience but also lead to a bit of confusion. The code examples we followed and used as the basis for our prototypes lead us to working directly with ARKit, with SceneKit for rendering. That’s all good but Apple seems to be pushing towards RealityKit as the preferred option for AR and the APIs and delegate callbacks are different enough to require a bit of work to switch between.
Also, the examples we found that implemented ARGeoAnchors for a real world experience were using RealityKit! The current message is a bit mixed from Apple but the important distinction is to recognise that RealityKit has its own rendering engine and doesn’t require SceneKit. This doesn’t really matter when using PHASE for audio but obviously you couldn’t then use the Scenekit SCNAudioPlayer.
Once we verified using PHASE with ARGeoAnchors, we could start thinking about UI. We settled on SwiftUI which is the newer, more familiar, declarative UI toolkit. The structure of SwiftUI projects is a little different from traditional UIKit projects so we needed to work out a bit of plumbing to translate the correct lifecycle elements from our UIKit prototypes in SwiftUI style.
The most important part of this is to have a struct that implements UIViewRepresentable, acting as a bridge to traditional UIKit code. Our ARViewContainer uses a Coordinator class to implement the necessary RealityKit (and underlying ARKit) delegate lifecycle callbacks. This gave a reasonable container for most of our experience code where we could do tasks like set up the AR coaching overlay, parse and load our virtual speaker information from hacked version of the GPX format and receive AR frame ticks to update the listener position in PHASE and generally manage its lifecycle.
We now have the majority of our challenges solved with a couple of caveats.
We ran out of time to dig deeper and test sound shape and direction from 4), only using attenuation, which was enough to design a first pass of the experience. The bigger omission is 5) Occlusion. Whilst this is certainly possible with PHASE, we’d need to manually model all the building geometry in our zone and teach the engine about it. This was just too big a task to be valuable given the time constraints and we are happy enough to drop that for this iteration.
Please check out the intro post to preview the experience and in the meantime, if you’re interested in our work you can follow along here or please get in touch if you need some help designing spatial audio experiences!
published on 09 Feb 2022
This project is gratefully supported by Innovate UK, the UK’s innovation agency.